

Sampling Setup with AgriPurpose
Role: Advisor
Define sampling horizon(s) (depth at which sample is to be taken). Standard sampling depth is 0-30cm.
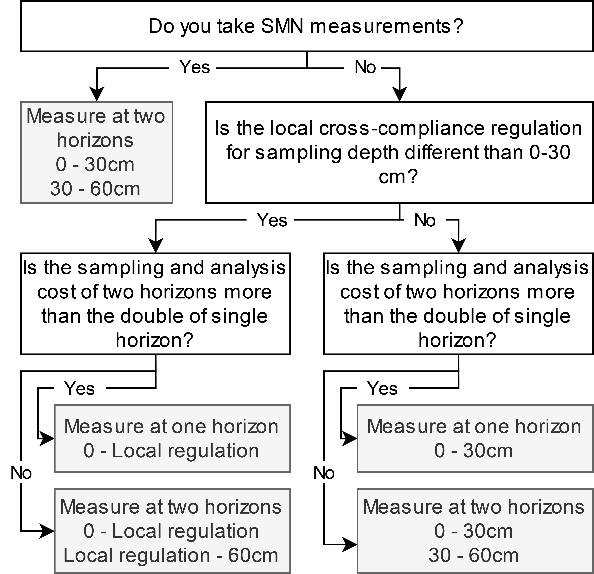
Once defined, use the same option for all samples unless specified differently by AgriPurpose. Also once decided the same sampler and Laboratory need to be kept for further sampling and evaluations to ensure consistent results. There are only the exception of bankruptcy or inaccuracy of measurements that make a change possible.


Field Shapes and portal
Role: Advisor
Prepare field shape file with field names included under the “name” attribute. Accepted formats: shapefile with subfiles ending .shp, .shx, .dbf, .prj, KML or geojson.
Only provide fields that represent one consistent management area and exclude forests, rocks, waterbodies and infrastructure.
Upload the file to the AgriPurpose Portal with your account or via API.
Select “Precision Sampling” in the app.
Select the fields to be sampled
Select the analysis to be performed and download the file for sampling
In the app you find instructions for the sampler and the lab
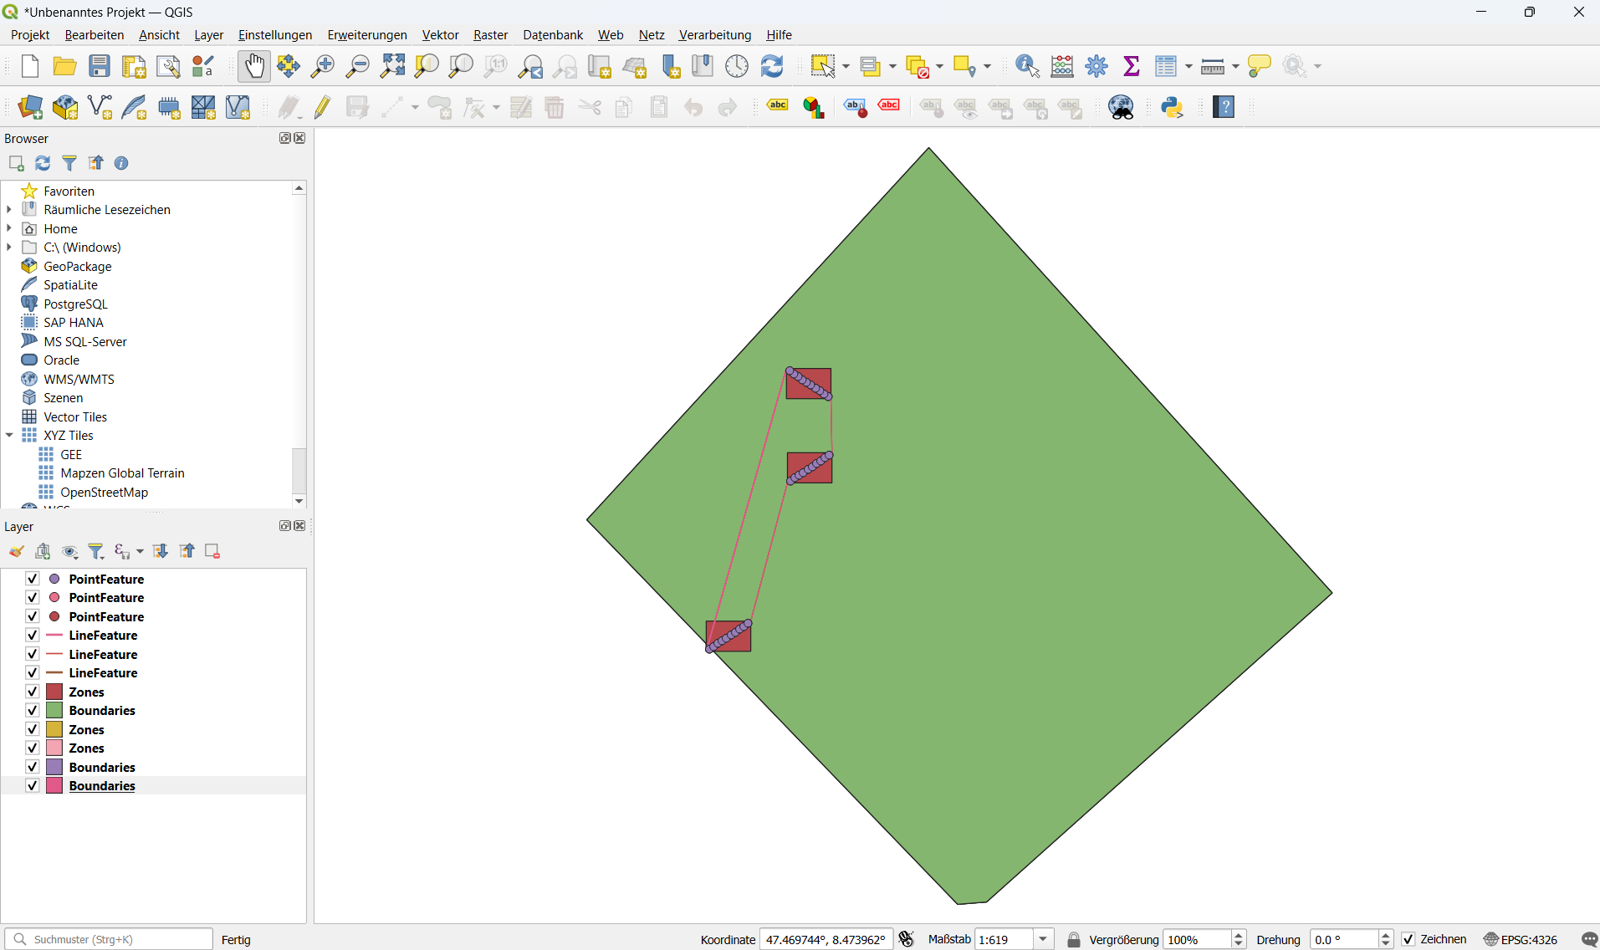
Each PS location is a 10x10m square, with a diagonal length of 14.1m.

Before Going to the Field
Role: Sampler manager / Sampler
Ensure that samples are taken between two crop cycles or in Spring before fertilization. Any resampling needs to be done at the same time of the year at the same place in the crop rotation as before.
Use a GPS device with a maximum error of 1 meter, ideally <30cm.
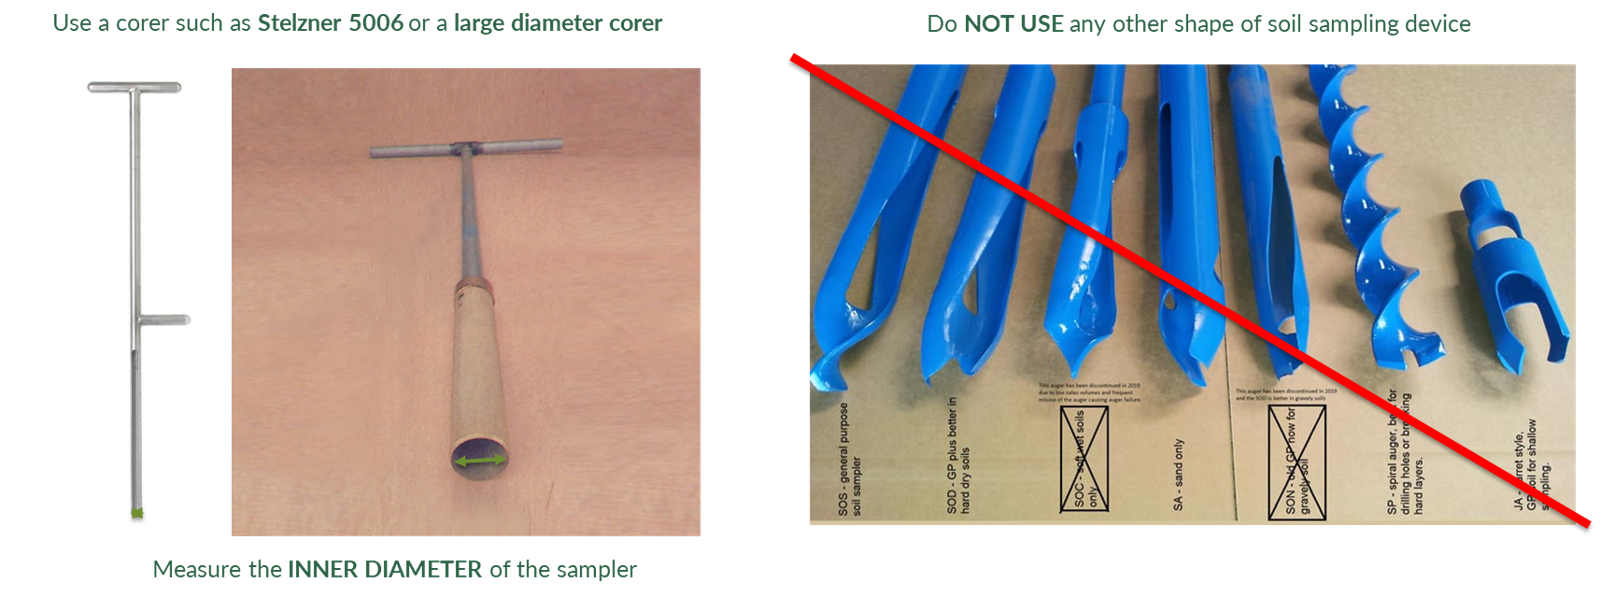
Ensure you have the appropriate equipment to collect soil at the agreed depth(s) that are usually 0-30cm. Use a core sampler like below (ideally with a machine) and none of the other ones to the right and measure the inner diameter of it. This number will need to be put into the portal for the data to be acquired in the field:
Make sure you have sufficient airtight plastic bags to store the soil samples from each Precision Sampling Location (PSL) and buckets for each sampled horizon.
Print the info provided by AgriPurpose for use during sampling and or use the app.

On the Field
Role: Sampler
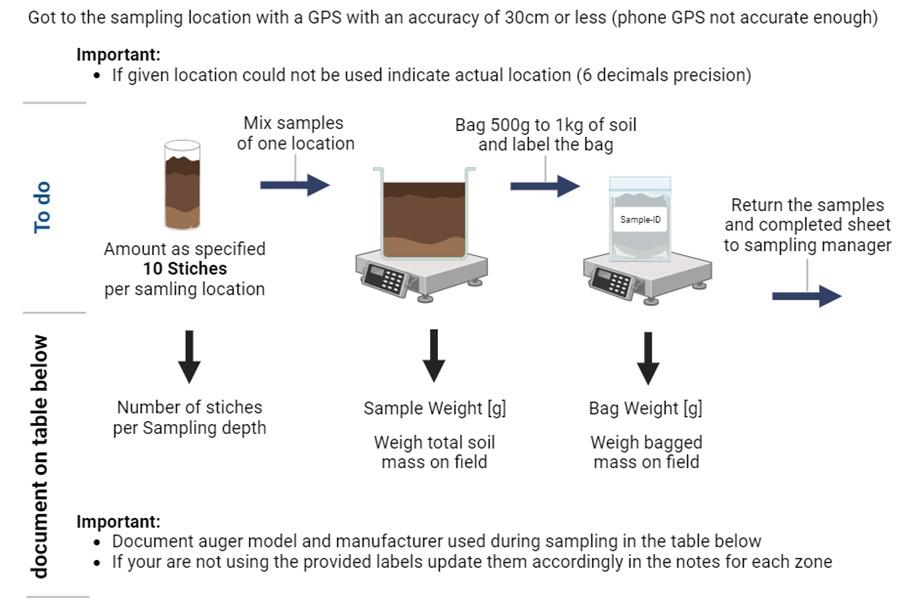
Go to the first precision sampling location (PSL) using the GPS.
Use the provided points to sample at the exact locations. As shown in Figure 3, exclude 2m at the beginning and 2m at the end of the diagonal, towards the border of the square. Along the remaining 10m length of diagonal, define the locations of the 10 stitches (1 stitch = Single point sample) with a separation of 1 m.
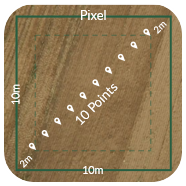
Precision sampling location and where to take samples.
For each stitching point, first clear the harvest residues and then collect soil from each horizon into a separate bucket.
Fill the required data into the excel or app
Weigh all the soil collected in step 3 and record the value under “Sample weight (g)” for the corresponding sampling point and horizon.
Mix the soil in each bucket, collected in step 3, to get homogeneous samples or take all soil from each bucket.
Take all soil or if too much go for about 500 grams per bucket and place them in separate airtight plastic bags.
Weigh each bag (either sampler or laboratory) and record the value under “Bag weight (g)” for the current PSL and horizon.
Label the bags with the ID given in the app
Repeat steps 3 to 9 for each PSL and horizon.
Send the bags and data as quickly as possible to the agreed laboratory.
For each PSL and horizon use separate plastic bags (do not mix soil from different horizons).
Stitch number, sampling depth (30cm) and sample weight are crucial for the bulk density assessment and need to be provided!

Confirm with the Laboratory
Role: Sampler Manager
For Soil Organic Carbon
Weighing, drying and sieving (< 2 mm) must be done before soil analysis.
Analysis requests should be made for Soil Organic Carbon (SOC) with:
Soil combustion method
Ideally Method: ISO 10694:1995
Make sure the following information is recorded in the app for each PS location:
ID (provided in the sampling package)
Sampling horizon (cm) If changed!
Sampling auger inner diameter (mm) and brand
No. of stitches per PSL If changed!
Sample Weight (g): Wet weight of the total collected soil measured in the field.
Bag Weight(g): Wet weight of the bagged sample (ideally assessed by the laboratory for increased accuracy)
Confirm with the Laboratory for Sediments, pH and Nutrients
Role: Sampler Manager
For Sediments & Nutrients
Drying and sieving (< 2 mm) must be done before soil analysis.
Analysis requests should be made for soil parameters with the locally agreed standard or the following ones, if there shall be a deviation or if the standard you use is not selectable in the platform for some reason, pls let us know:
| Parameter | Solution | |
|---|---|---|
| N-Mineralization | DIN 19746 | |
| Clay | DIN ISO 11277:2002-08 (Köhn) | |
| Silt | DIN ISO 11277:2002-08 (Köhn) | |
| Sand | DIN ISO 11277:2002-08 (Köhn) | |
| pH | CaCl2 or KCl solution | |
| Phosphorus | calcium acetate lactate (CAL) | |
| Potassium | calcium acetate lactate (CAL) | |
| Magnesium | CaCl2 | |
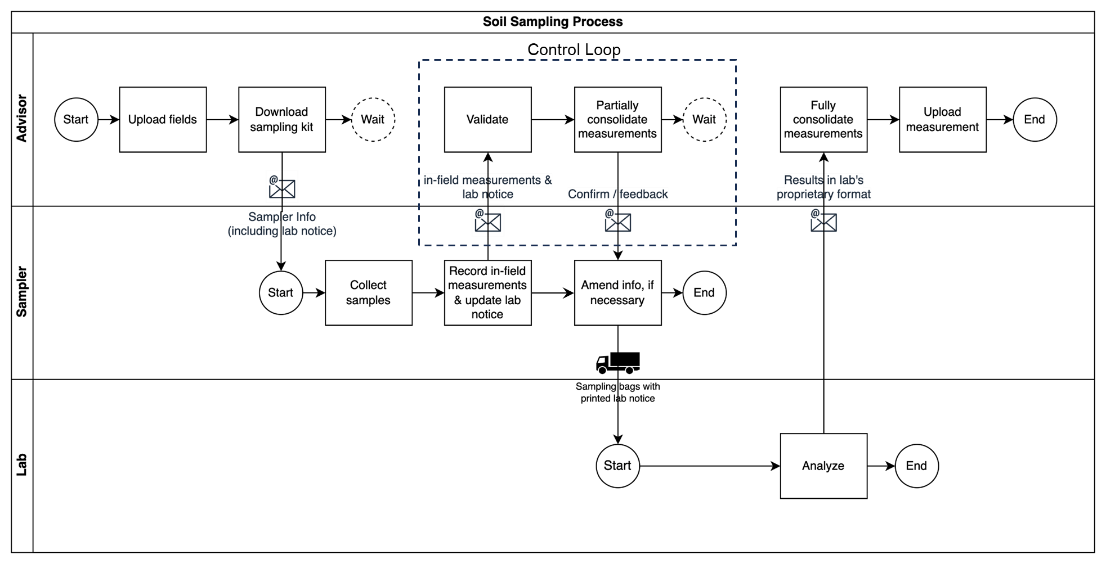 Data Flow of the Sampling Process

After the Laboratory Results
Upload the consolidated data to the AgriPurpose platform or check results if provided via API. If help is required. Email: sampling@agripurpose.farm
AgriPurpose will analyse the data and calculate the carbon stock for the region of interest.
AgriPurpose will share the results via API or directly on the platform.